Bridge Pose
Written by Steve Johansen April 13, 2023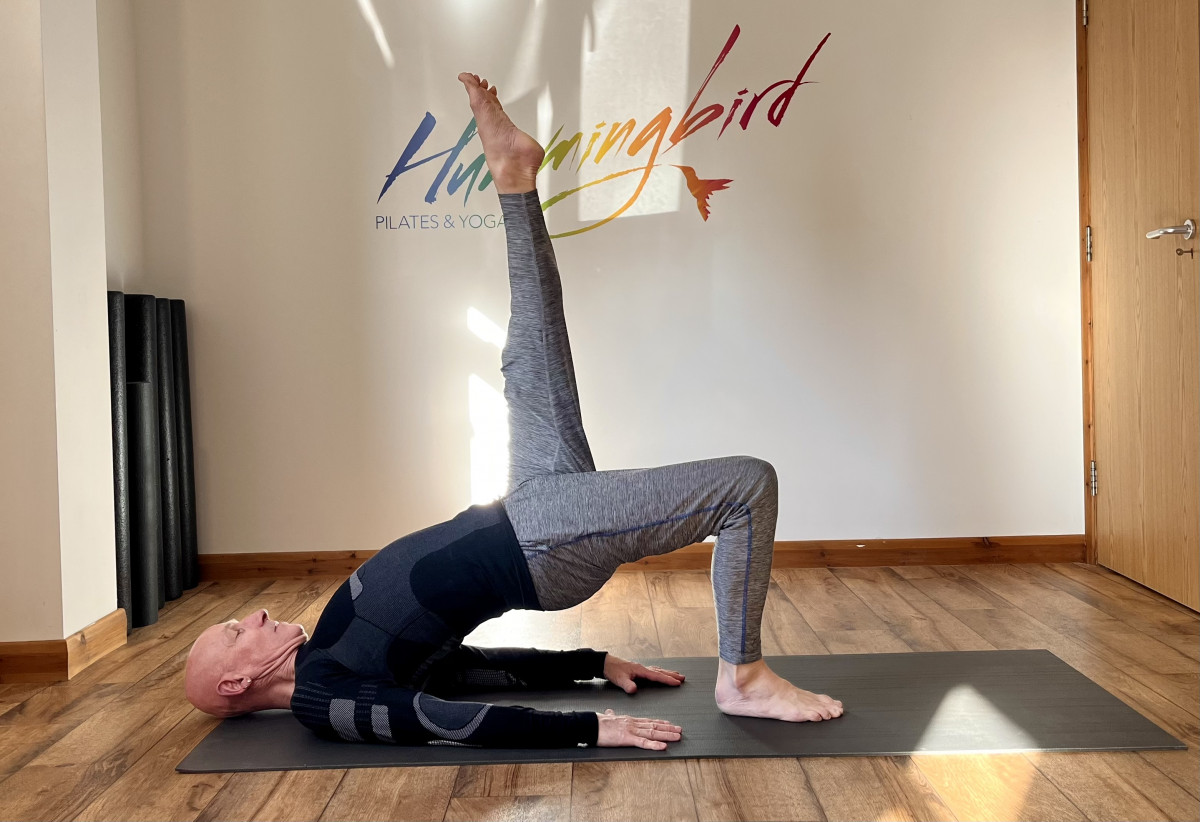
Bridge Pose
by Steve Johansen, Hummingbird Pilates and Yoga
This month I'm going to focus on another foundational yoga pose, Bridge Pose, which is a backbend, in Sanskrit it’s called, Setu Bandha Sarvangasana, pronounced (SET-too BUHN-dah Sahr-von-GAH-sah-nah).
Bridge pose is an extremely versatile pose, which I often use: at the beginning of my practice, as a gentle warm-up, in the middle, as a dynamic and strengthening pose and at the end, for its calming and restorative benefits.
Bridge pose is not just a backbend, it shares many of the same benefits of other inversions such as shoulder stands and headstands but is a gentler alternative. Bridging improves your posture, counteracting the effects prolonged sitting. Strengthens your mid- to upper-back muscles, buttocks, core, thighs, and ankles and gently stretches your shoulders, chest, and abdomen.
Where to start
I always take my time to establish a good foundation for bridge pose. Lie down on your back, legs extended, hands down by our sides and find Shavasana (Corpse pose). Then find your Dristi, directly above you, and introduce your three-part breath, breathing in and out slowly through your nose, filling your belly, mid-chest, and upper chest, with a little pause at the top and the bottom of each breath, do this a few times, establishing a slow, even and steady breath.
Relax your shoulders, and stretch your arms by your sides, palm's facing down. Draw your feet in, as close towards your bottom as you can, heels hip width apart, (4 inches or 10cm between your ankles and knees). Feel the four corners of your feet, e.g. big toe joints, your little toe joints and the inside and outside edges of your heels, ideally you want your ankles to be directly under your knees. Tuck your chin in towards your collarbones, then lower the base of your skull to the mat, before
lifting your chin very slightly to re-find your Dristi, this will lengthen the back of your neck, avoiding any uncomfortable compression. Maintain slow steady breath. Try to make your movements, last the entire length of each inhalation and exhalation.
On your next Inhalation, press gently through the 4 corners of your feet, as you do this, you’ll feel your pelvis tilt upwards, pressing your lower back into the floor, keep rolling up through your spine. You’ll feel front of your thighs tighten; your core engage. Try to maintain this, through the pause and your next exhalation, pausing at the bottom of your breath. As you breathe in again, draw your belly button inwards, to engage the core a bit more, and press through your hands, elbows and especially your shoulders. Ground more firmly, through the 4 corners of your feet, and begin to roll upwards, from your tail bone all the way up your spine, one vertebra at a time, try to keep the knees hip width apart, as you push them towards the front of the room, the hips to the ceiling and your sternum to the back of the room. Pause and hold the pose for your out breath. Then, lift the hips a little higher on your next inhalation, pausing, before rolling down one vertebra at a time, as you breathe out.
I tend to do this pose in sequence, three or five times, in a row. Rolling up with each inhalation, and holding for the exhalation, then lifting higher on the next inhalation, before rolling back down, in time with the outbreath. The little pause at the top and the bottom of the breath, really focuses the mind on the breathing, as well as on the movement.
I hope that you enjoy this pose as much as I do. For those of you who would benefit from seeing the pose taught in action, you can find a video on our at Hummingbird Pilates & Yoga Facebook page both pinned to the top and as one of our reels. Alternatively, book now and join me at the studio using this free pass code HPYFREECLASS. My gift to you.
Categories
Contact Us
Reeds Farm Estate,
Roxwell Road,
Writtle,
Chelmsford,
Essex, CM1 3ST
Tel: 01245 422 556
Hummingbird Pilates & Yoga
The largest specialist Pilates, Yoga and Meditation studios in Chelmsford, is owned by Ellie Searle & Steve Johansen. Along with a great team of inspirational teachers they share a holistic but realistic approach to life. Ellie is a Clinical Specialist Physiotherapist who has designed Hummingbird for those who want to maintain good health and well-being or rehabilitate from injury, ill heath or surgery. Hummingbird is perfect for those who want to exercise safely in older age. Steve is a perfect example of how daily yoga can enhance your well-being and has appeared in the book Yoga Rockstars and Om Yoga Magazine.
Based in a beautifully converted barn in Writtle, Chelmsford, Essex, the 2 fully equipped studios host over 50 small group classes a week and a variety of therapies all designed to make you feel better.
A fun, friendly and flexible schedule to fit your busy lifestyle, the first step to a relaxed and healthy body and mind.
Reeds Farm Estate, Roxwell Road, Writtle, Chelmsford, Essex, CM1 3ST
© Hummingbird | Terms & Conditions | FAQ | Privacy | Sitemap